В част 3 от проекта домашна метео станция вече стигаме до най-интересната (за мен) част – свързването на всички сензори и извличане на данните от тях.
Първата стъпка ще е добавянето на ethernet shield-a към основната платка – просто го щракваме върху нея – нищо особено 🙂
*Тук е момента де се отбележи - ако станцията ви ще е в някаква малка кутия или метео клетка, доста желателно е да изведете датчиците с кабел максимално далече от платката.
Основния чип на ethernet shield-a загрява съвсем спокойно до 42-43 градуса при 22 градуса околна температура, което може да повлияе сериозно на получените данни.
След като имаме основните модули събрани, може да добавим и сензорите:
Това което направих аз е:
- Свързване на BMP180 сензора за атм. налягане и температура: SCL към аналогов пин 5, SDA към аналогов пин 4, VDD към пина с 5 волта, GND към маса;
- Свързване на SHT75 сензора за темп. и влажност: Clock(Pin1) на цифров пин 2, Data(Pin4) на цифров пин 3, Vcc (Pin2) към пина с 5 волта, GND (Pin3) към маса. За DHT11 свързването става по сходен начин;
- Свързване на сензора за дъжд: А1 на аналогов пин 1, Vcc към пина с 5 волта, GND към маса.
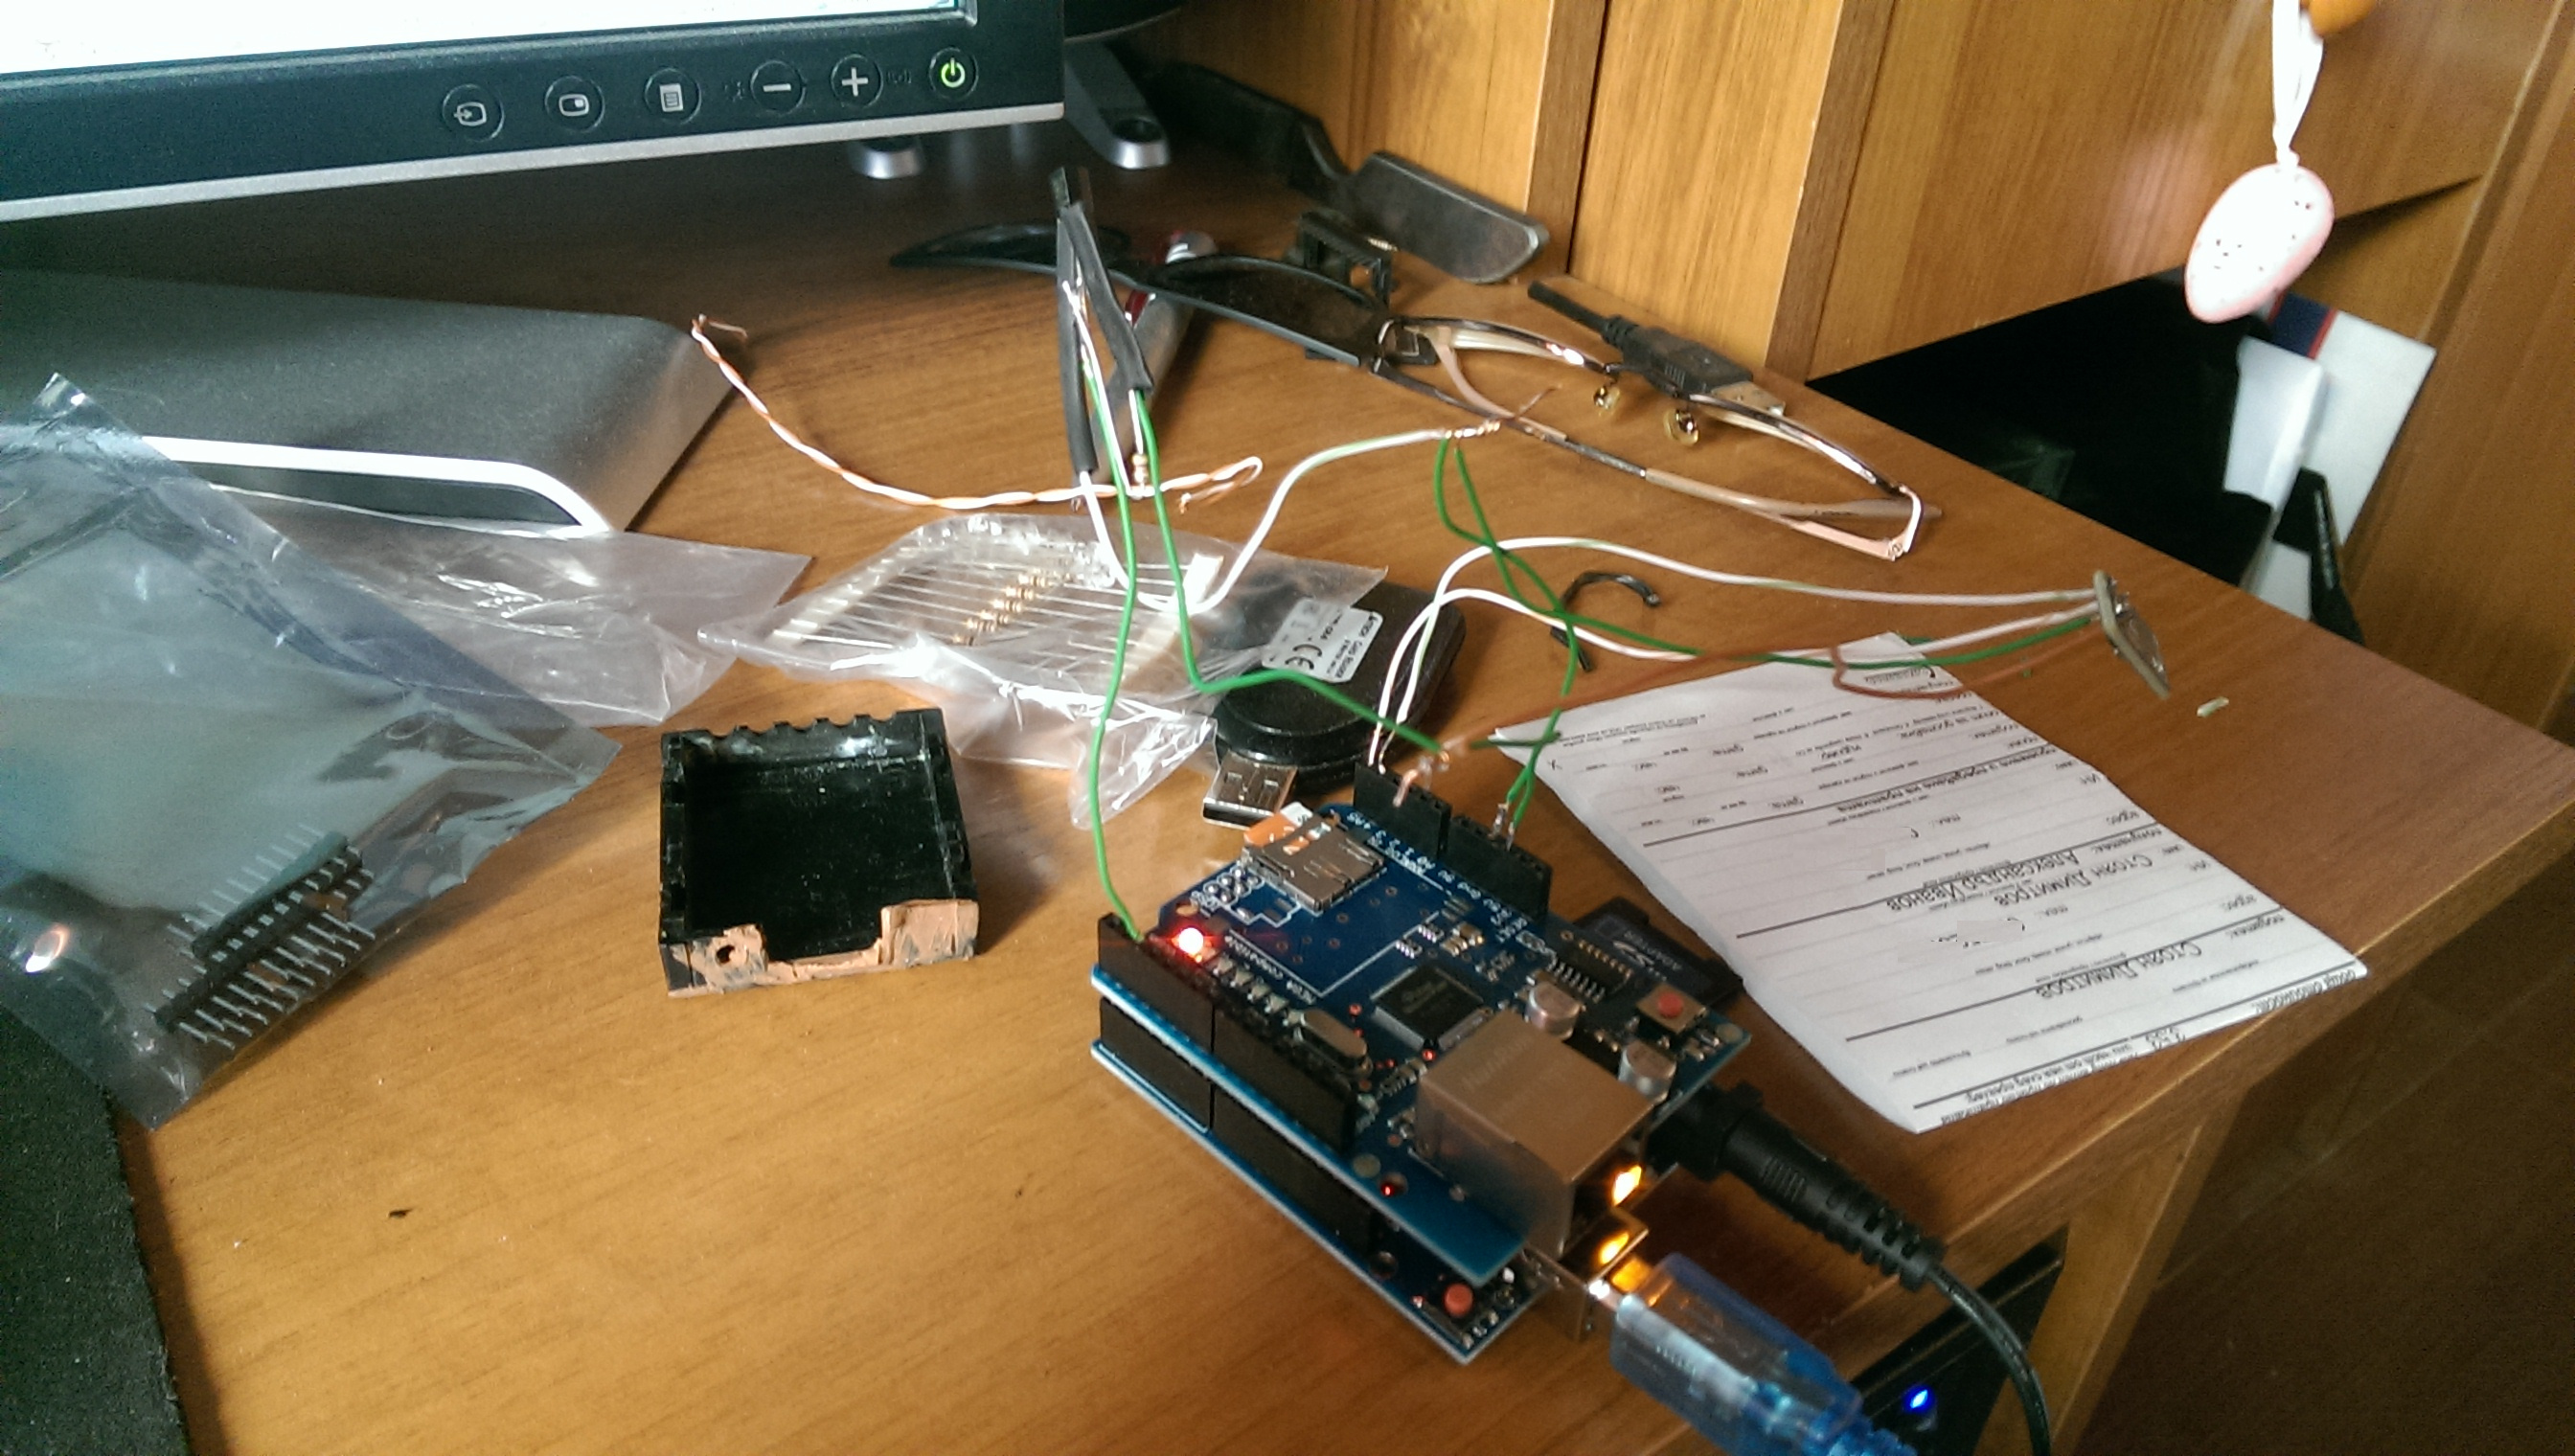
Ето как изглежда тестовия вариант на платката със закачени сензори BMP180 и DS18B20, който ползвах първоначално за температурата:
След като сме свързали сензорите, остава да напишем кода, който да извлича данните. Някои сензори изискват библиотека за използването им, например BMP180 изисква библотека, която може да бъде свалена от ТУК
По-долу ще пусна кода, който написах аз със коментари кое какво прави по-точно. Като цяло резултата от кода е принтирането на резултатите от сензорите в серийния монитор (Tools > Serial Monitor), както и Web сървър на определен IP адрес, който вади данните в минималистичен вид, така че после да може да се свалят и обработят лесно:
#include <Wire.h>
#include <SPI.h>
#include <Ethernet.h>
#include <Adafruit_Sensor.h>
#include <Adafruit_BMP085_U.h>
#include <Sensirion.h>

/*
   Connections [BMP180]
   ===========
   Connect SCL to analog 5
   Connect SDA to analog 4
   Connect VDD to 5V DC
   Connect GROUND to common ground

   Connections [SHT75]
   ===========
   Connect Clock(Pin1 - White) to 2 (digital)
   Connect Data(Pin4 - Yellow) to 3 (digital)
   Connect Vcc (Pin2 - Red) to 5V DC
   Connect GND (Pin3 - Black) to common ground
*/
/*Sensirion SHT75 Constants*/
const uint8_t dataPin =  3;              // SHT serial data
const uint8_t sclkPin =  2;              // SHT serial clock
const uint32_t TRHSTEP   = 5000UL;       // Sensor query period
const int rainMin = 0;     // rain sensor minimum
const int rainMax = 1024;  // rain sensor maximum

Sensirion sht = Sensirion(dataPin, sclkPin);

uint16_t rawData;
float temperature;
float humidity;
float humidex;
float dewpoint;

byte measActive = false;
byte measType = TEMP;

unsigned long trhMillis = 0;             // Time interval tracking

/*Sensirion SHT75 Constants END*/

Adafruit_BMP085_Unified bmp = Adafruit_BMP085_Unified(10085); //BMP180 code
/*OneWire  ds(7);  // on pin 2 (a 4.7K resistor is necessary)*/
float celsius = 0; // global temperature variable
float pressurekPa = 0; //global pressure variable

//Ethernet setup >
byte mac[] = {
  0xDE, 0xAD, 0xBE, 0xEF, 0xFE, 0xED
};
IPAddress ip(192, 168, 1, 200);
IPAddress gateway(192, 168, 1, 1);
IPAddress subnet(255, 255, 255, 0);
EthernetServer server(80);

void setup(void)
{
  Serial.begin(9600);
  /*SHT75 SETUP:*/
  delay(15);                             // Wait >= 11 ms before first cmd
// Demonstrate blocking calls
  sht.measTemp(&rawData);                // sht.meas(TEMP, &rawData, BLOCK)
  temperature = sht.calcTemp(rawData);
  sht.measHumi(&rawData);                // sht.meas(HUMI, &rawData, BLOCK)
  humidity = sht.calcHumi(rawData, temperature);
  dewpoint = sht.calcDewpoint(humidity, temperature);
  logData();
  /*SHT75 SETUP END*/

  /* Ethernet config */
  Ethernet.begin(mac, ip);
  server.begin();
  Serial.print("server is at ");
  Serial.println(Ethernet.localIP());

  /* Initialise the BMP180 sensor */
  if(!bmp.begin())
  {
    /* There was a problem detecting the BMP180 ... check your connections */
    Serial.print("Ooops, no BMP180 detected ... Check your wiring or I2C ADDR!");
    while(1);
  }

}

void loop(void)
{
    /* Temp readings: */
    /*SHT75 loop: */
      unsigned long curMillis = millis();          // Get current time

      // Demonstrate non-blocking calls
      if (curMillis - trhMillis >= TRHSTEP) {      // Time for new measurements?
        measActive = true;
        measType = TEMP;
        sht.meas(TEMP, &rawData, NONBLOCK);        // Start temp measurement

        BMP180();                                  // Pressure measurement

        trhMillis = curMillis;
      }
      if (measActive && sht.measRdy()) {           // Note: no error checking
        if (measType == TEMP) {                    // Process temp or humi?
          measType = HUMI;
          temperature = sht.calcTemp(rawData);     // Convert raw sensor data
          sht.meas(HUMI, &rawData, NONBLOCK);      // Start humidity measurement
        } else {
          measActive = false;
          humidity = sht.calcHumi(rawData, temperature); // Convert raw sensor data
          dewpoint = sht.calcDewpoint(humidity, temperature);

          //humidex code:
          float h,e; //humidex and other
          e = 6.11 * exp(5417.7530 * ((1/273.16) - (1/(dewpoint + 273.15))));
          h = (0.5555)*(e - 10.0);
          humidex = temperature + h;
          logData();
        }
      }
    /*SHT75 loop end*/


  /* Web server: */
    EthernetClient client = server.available();
  if (client) {
    Serial.println("new client");
    // an http request ends with a blank line
    boolean currentLineIsBlank = true;
    while (client.connected()) {
      if (client.available()) {
        char c = client.read();
        Serial.write(c);
        // if you've gotten to the end of the line (received a newline
        // character) and the line is blank, the http request has ended,
        // so you can send a reply
        if (c == '\n' && currentLineIsBlank) {
          // send a standard http response header
          client.println("HTTP/1.1 200 OK");
          client.println("Content-Type: text/html"); // text/html
          client.println("Connection: close");  // the connection will be closed after completion of the response
          //client.println("Refresh: 5");  // refresh the page automatically every 5 sec
          client.println();
          //client.println("<!DOCTYPE HTML>");
          //client.println("<html>");
          // output the data
            client.print(temperature);
            client.print(" ");
            client.print(humidity);
            client.print(" ");
            client.print(pressurekPa);
            client.print(" ");
            client.print(dewpoint);
            client.print(" ");
            client.print(humidex);
            client.print(" ");
            client.print(analogRead(A1));
            //client.println("<br />");

          //client.println("</html>");
          break;
        }
        if (c == '\n') {
          // you're starting a new line
          currentLineIsBlank = true;
        }
        else if (c != '\r') {
          // you've gotten a character on the current line
          currentLineIsBlank = false;
        }
      }
    }
    // give the web browser time to receive the data
    delay(1);
    // close the connection:
    client.stop();
    Serial.println("client disconnected");
  }
}


void BMP180() {
  delay(1500);
  /* Get a new sensor event */
  sensors_event_t event;
  bmp.getEvent(&event);

  /* Display the results (barometric pressure is measure in kPa) */
  if (event.pressure)
  {
    /* Display atmospheric pressue in kPa */
    Serial.print("[BMP180]Pressure:    ");
    Serial.print(event.pressure / 10);
    pressurekPa = event.pressure / 10;
    Serial.println(" kPa");

    /* First we get the current temperature from the BMP085 */
    float temperature;
    bmp.getTemperature(&temperature);
    Serial.print("[BMP180]Temperature: ");
    Serial.print(temperature);
    Serial.println(" C");

    /* Then convert the atmospheric pressure, and SLP to altitude         */
    /* Update this next line with the current SLP for better results      */
    float seaLevelPressure = 1022 /*SENSORS_PRESSURE_SEALEVELHPA*/;
    Serial.print("[BMP180]Altitude:    ");
    Serial.print(bmp.pressureToAltitude(seaLevelPressure,
                                        event.pressure));
    Serial.println(" m");
    Serial.println("");
  }
  else
  {
    Serial.println("Sensor error");
  }
}

    void logData() {
      Serial.print("[SHT75]Temperature = ");   Serial.print(temperature);
      Serial.print(" C, Humidity = ");  Serial.print(humidity);
      Serial.print(" %, Dewpoint = ");  Serial.print(dewpoint);
      Serial.println(" C");
      Serial.print("Humidex: ");
      Serial.println(humidex);
      Serial.print("Water Level: ");
      Serial.println(analogRead(A1));
    }
По-горния код ще направи уеб сървър на IP адрес 192.168.1.200, където на един ред ще се извеждат данните от всички сензори. Тези данни вече може да взимате, за да си генерирате графики, да си ги съхранявате във файл или каквото намерите за най-удобно във вашия случай. Аз лично използвам линукс машина, която чертае графики посредством munin софтуер за графики (базиран на rrdtool). Има хиляди решения за чертане на графики, просто трябва да разгледате опциите.
В най-общи линии това е техническата част на станцията, ако искате точни данни обаче, съветвам ви да си направите дървена метео клетка.